What’s This Bug? 1/16 Inch Flying Bugs Found In Coffee

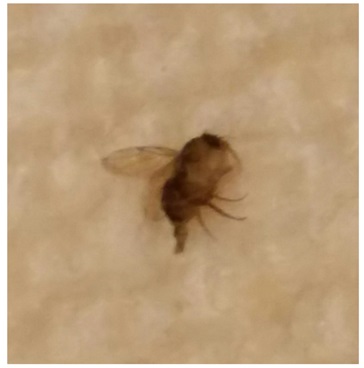
tiny flying bug with banded body
What:
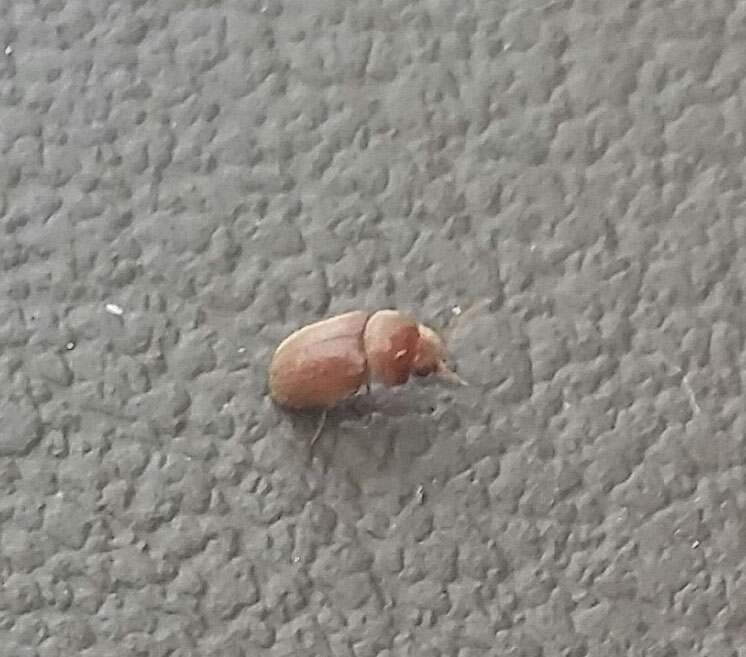
Tiny flying bugs measuring about 1/16″ long.
Tiny Flying Bugs with Banded Bodies 2
Where:
“The brownish tinge to the pictures is from a paper towel stained with coffee as my wife found them in coffee left over from the day before.  We have seen a few of these flying around in the kitchen and have searched everywhere to see where they are coming from.  No luck.
We live in South Florida and it has been fairly cold here for the last week or so.  Possibly, that is relevant to identification.”
Tiny Flying Bugs with Banded Bodies 3

Do you know what type of bugs these are?

Let us know below.

Got an ID request yourself?

Are little insects bugging you? Are you itching to know which bug you are dealing with?

  • Send a clear picture to dd2 [@] live [dot] nl.
  • Mention size. For instance 2 mm.
  • If possible with something for scale in it. Or something on the background. A remote control, a coin, or a banana if  you must.
  • Mention where you encounter the bugs. For example; in your living room in Carlsbad, California.
  • Mention characteristics. Do they fly? Do they bite?


We will post your pics here and help you determine what you’re dealing with.

What’s This Bug? Moth Cocoon That Looks Like Dust?

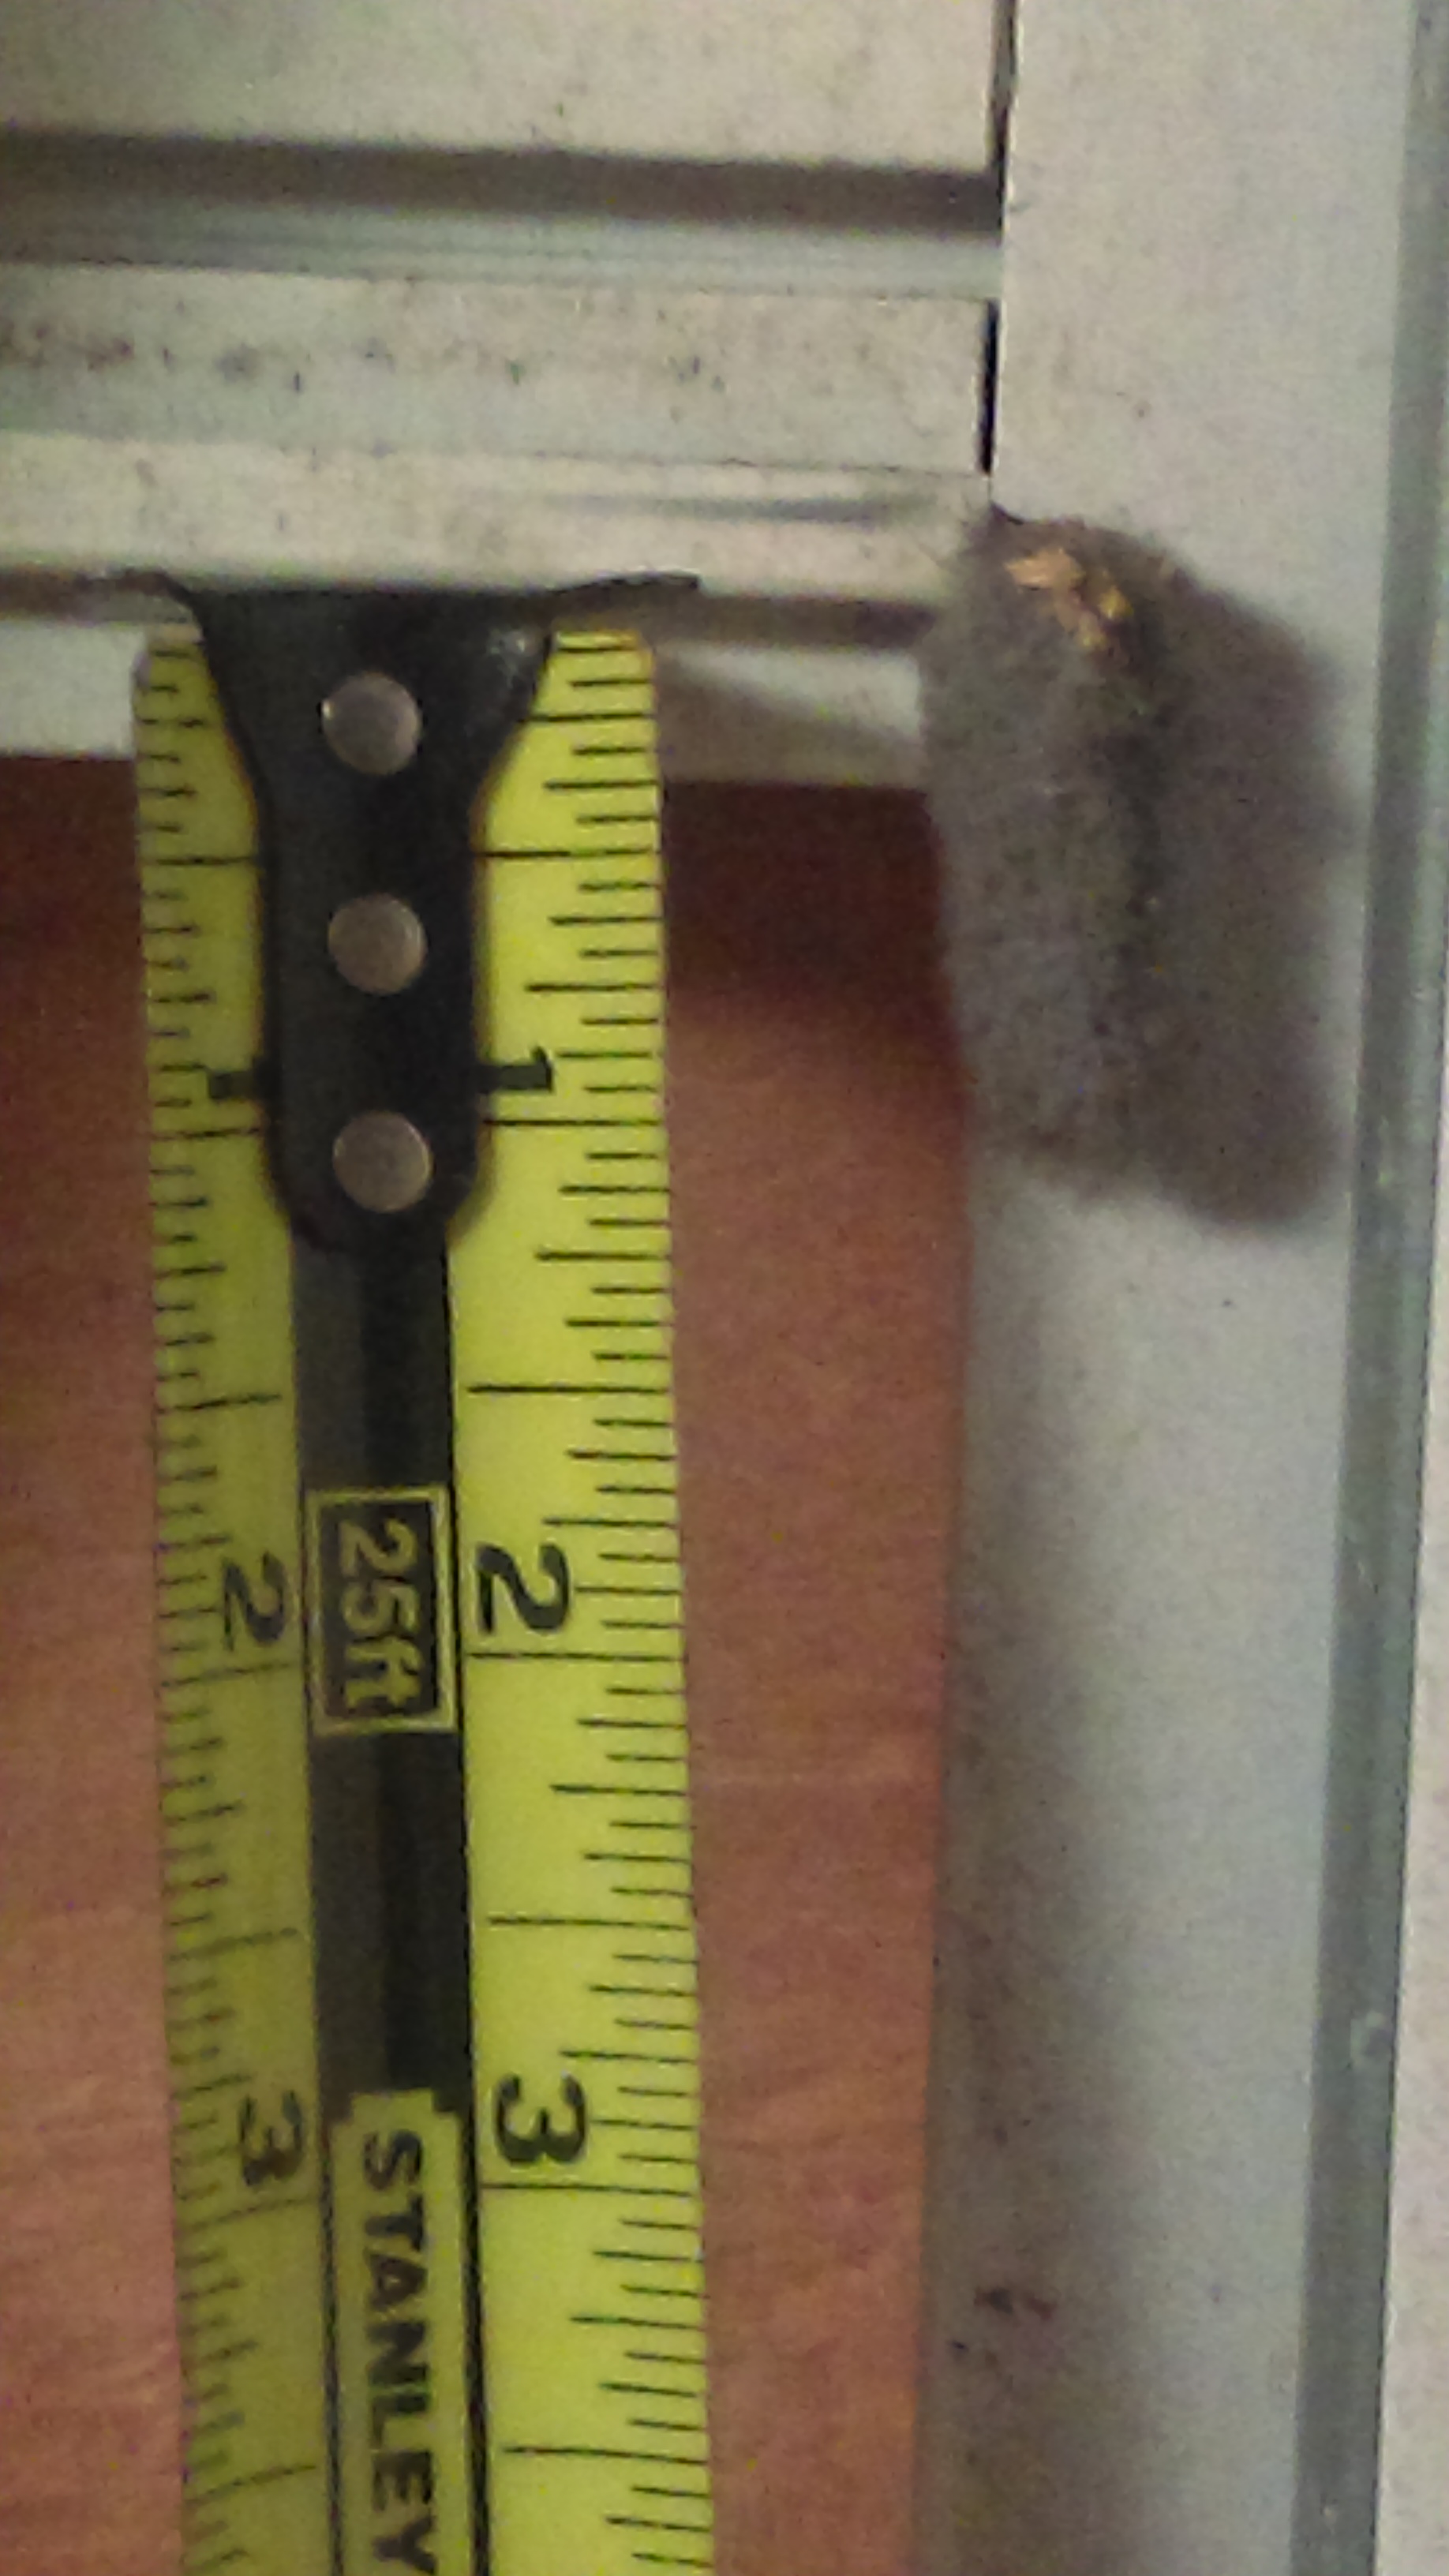
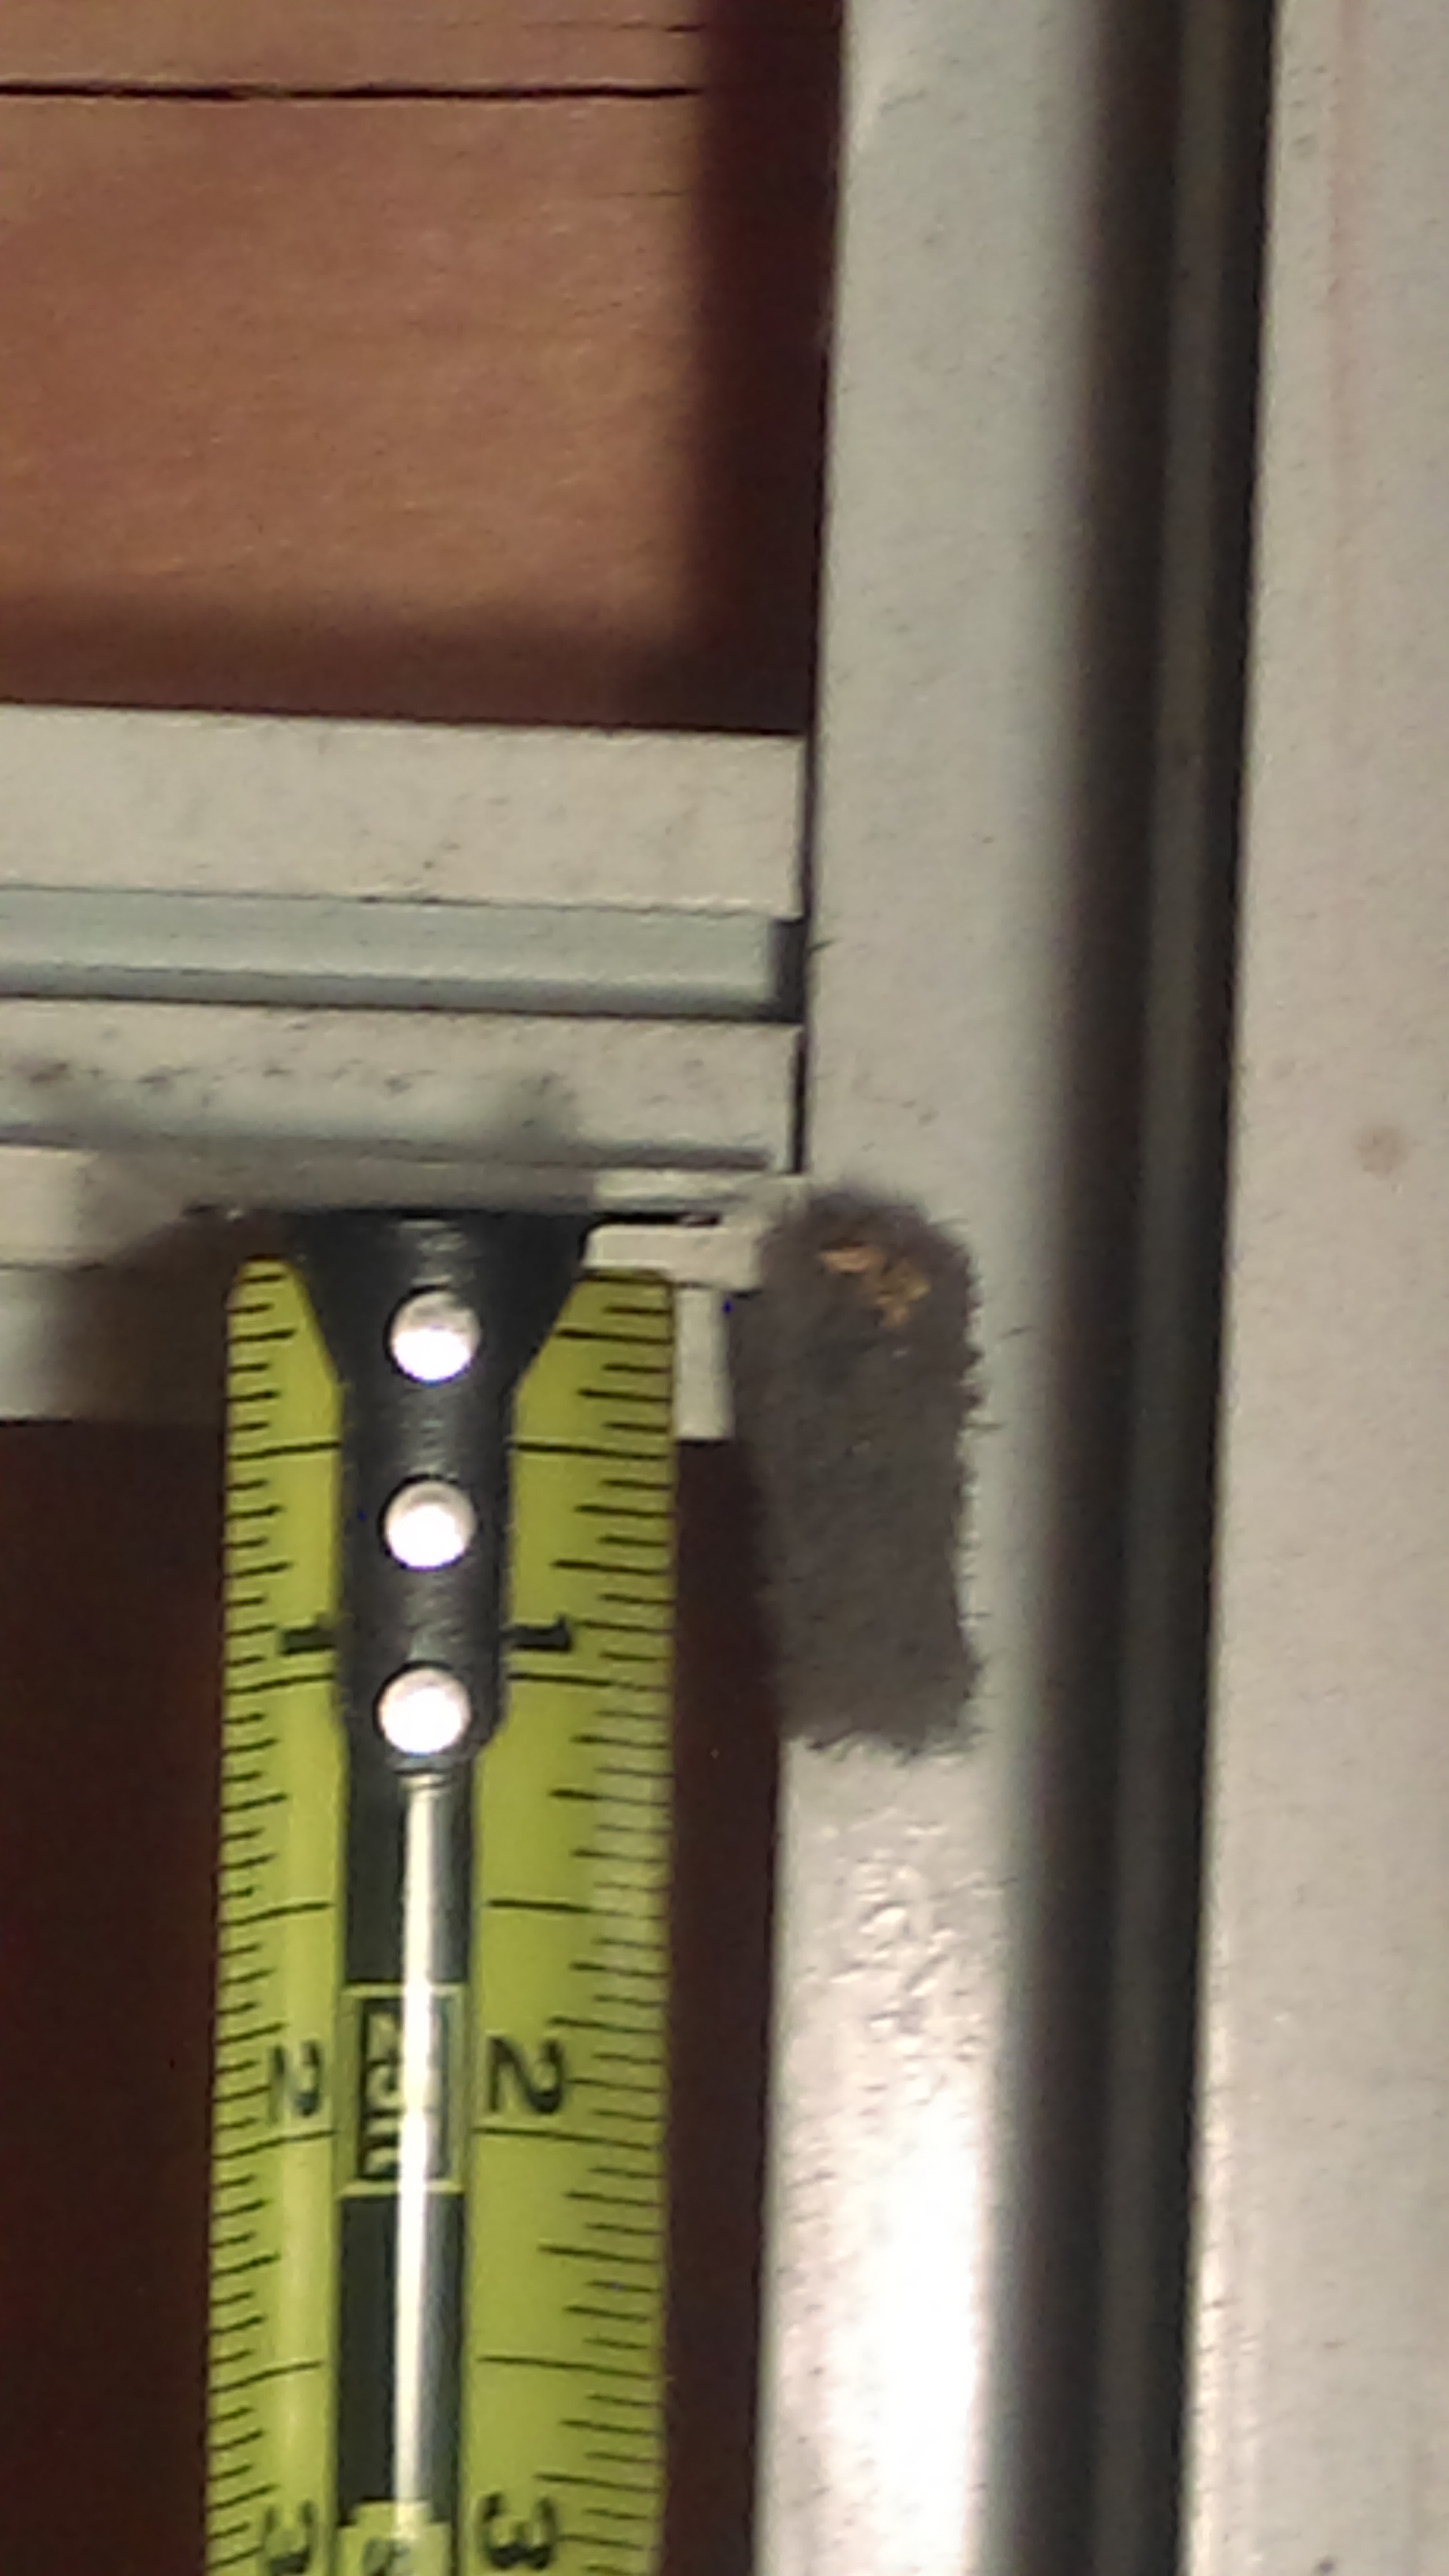
what's this bug that looks like a dust cocoon
is this some kind of insect larva?


is this dusty thingy a bug or cocoon?
dust with hairs?


What:

I thought at first it was just a huge piece of dust, but looking closer, I realized the dust looks more like hairs.

Where: 

I am currently fixing up an abandoned house that the windows are all boarded and there is no air conditioner. I just found this on one of the window frames on the metal.

What else:

I do have a problem with a lot of bag worms all over the outside and inside of my house. I thought it could be a cocoon of a moth.

And if it is does it have anything to do with the bag worms?


Do you know what this is?

Any idea what this is? Perhaps you have fixed up an old building yourself. Or had to deal with (plaster) bag worms and recognize the unknown specimen.

Entymologists and other folks who happen to know what this weird dusty thing is, please let us know in the comment section below.


Got an ID request yourself?

Are little insects bugging you? Are you itching to know which bug you are dealing with?

  • Send a clear picture to dd2 [@] live [dot] nl.
  • Mention size. For instance 2 mm.
  • If possible with something for scale in it. Or something on the background. A remote control, a coin, or a banana if  you must.
  • Mention where you encounter the bugs. For example; in your living room in Carlsbad, California.
  • Mention characteristics. Do they fly? Do they bite?


We will post your pics here and help you determine what you’re dealing with.

31 Ways To Get Rid of Slugs And Snails In The Garden

Snails and slugs are a nuisance to gardeners worldwide. Your spring vegetable and herb garden offers a banquet to these pesky mollusks, which largely remain hidden during the day, and emerge to feast on your plants during the night.

When you go outside in the morning to check on your garden, the chewed leaves and stems of your prized garden plants provide evidence that they were out while you slept.

How do you control these garden pests?

Here are the most common ways to keep your vegetable and ornamental crops safe. Get rid of slugs and snails on your fruit trees, your greenhouse, your orchard, and organic herbs.

31 tips to control snails and slugs in the garden:


1. Pick them Off by Hand.

Ewwww. Yes, we get it, this remedy is not for everyone. If you do decide to go this way, wait an hour or two after the sun goes down, and go out and inspect your garden plants with a flashlight.

If you see any snails or slugs on your plants, remove them. If you don’t want to touch these slimey critters with your bare hands, wear a latex surgical glove, or use a tweezer or pair of chop-sticks to catch the slugs/snails.


2. Make Slug Traps.

There are a number of ways to do this yourself. You can lay boards on the dirt between the plants being attacked. Slugs will seek shelter out of the sunlight during the daytime hours.

You can then go out and lift up the boards, scoop-up any slugs you find, and remove them from your garden.

Another DIY trap is to take an old terra cotta flower pot, and turn it upside down over a board, leaving it propped-up on one side so snails and slugs can crawl under the pot to hide during the day.

Besides making your own there’s also the option of store-bought slug traps. Periodically check the pot and dispose of any slimy critters you come across.

  • Pro tip: If you set snail traps by digging a hole in the ground and set a used can inside make sure NOT to place it so that the edges are even with the soil. This will cause beneficial creatures to fall in and drown as well. Slugs and snails will climb in even if it’s not buried at all.


3. Feed them Citrus Peels.

Slugs love citrus, so don’t throw away your orange or grapefruit rinds. Instead put them in your garden to bait the slugs and snails away from your plants.

In the morning, check your peels to see if any slugs or snails are on them, and remove these from your garden. Refresh with new peels as appropriate to continue your decoy operation.


4. Encourage Predators to Visit Your Garden.

Try to encourage lightning bugs to breed in your garden. The larval form of this insect (the glowworm) is a voracious predator, and slugs are on its menu.

Rove beetles are another carnivorous insect that are attracted to slugs and snails. Encourage toads to inhabit your garden, as they will also eat a lot of slugs.

Releasing a pet duck or chicken in your garden will also result in many eaten slugs and snails. If a possum visits your neighborhood at night, it will also eat snails and slugs.

Frogs and toads are natural predators of slugs and snails too. Encourage these critters to reside in your yard by setting up a ceramic toad house. Or make a DIY toad house from an old plant pot.

  • Other predators: crows, blackbirds, jays, owls, robins, trushes, starlings and seagulls.


5. Deter them with Scratchy Surfaces.

Slugs and snails do not like to crawl over scratchy surfaces. You might try surrounding the stems of your plants with crushed egg shells, a layer of diatomaceous earth, or insert a sand-paper collar around the stem.

These methods will not kill slugs or snails, but might slow them down and keep them off your plants.


6. Use diatomaceous earth

Also called insect dust, this natural product which is safe for human or animal consumption, works as a barrier.

Just like with egg shells it has sharp, very fine, edges that are harmful to the soft bodies of slugs and snails.

Sprinkle diatomaceous earth on soil around plants you want to protect. Keep in mind that it is less potent when wet requiring new application after rainfall or plant watering.

Make sure to get food-grade, untreated diatomaceous earth that is formulated for garden use.


7. Deter them with Copper.

Research shows that slugs and snails cannot tolerate crawling on copper surfaces, which gives them a mild electrical shock when they touch it.

You can put copper bands around your flower pots, fruit-tree trunks, etc., to deter them from crawling up and onto the foliage of your plants.

You can also attach copper flashing to the edges of your grow-beds and greenhouse benches. This method will deter slugs and snails, but will not kill them.

In addition to special copper mesh (commonly uses as a mice deterrent),  copper tape barrier, and copper band rings to put on plant pots, you can also use pennies to keep slugs and snails away.


7. Deter them with Predatory Snails.

See if the European Decollate Snail has been introduced to your area to combat the invasive garden snail. If it has, introduce them to your garden.

It will eat any snails or slugs it comes across. Though it might also feed some on your vegetation, it is mostly carnivorous and attracted to other land-mollusks.


8. Deter them with Herbal Repellents.

Plant sage (salvia officinalis) or mint around your garden plants. These will help deter slugs and snails from coming into your garden. Other herbs and plants which may deter snails and slugs include hyssop, chives, garlic, fennel, geraniums, and foxgloves.

Don’t make the mistake to plant Salvia splendens (scarlet sage, tropical sage) which actually atracts slugs.


9. Make a Vinegar Spray.

Mix equal parts water and vinegar in a pump spray bottle. Go out into your garden during the hours that snails and slugs are active, and spray any that you see.

Vinegar is mildly acidic and will kill any snails or slugs it touches. Vinegar is toxic to vegetation, so only spray snails or slugs that are not on your plants.


10. Make an Ammonia Spray.

Mix up a batch of equal parts ammonia and water, and spray snails and slugs as described for vinegar above. While vinegar is an acid, ammonia is a strong base and will also kill any snails or slugs it contacts.


11. Make a Dog or Cat Food Trap.

Take a tin-foil pie plate and cut openings along the rim large enough to allow snails to enter. Place these upside down over a small pile of dog or cat food.

The slugs and snails will be attracted to the pet food and find the upturned pie plate a nifty hiding place for the day. Go out during day time and remove the pie tin and scoop up and dispose of any snails or slugs you find.


12. Use a Beer or Yeast and Honey Mixture.

Snails and slugs are attracted to the scent of beer or a mixture of yeast and honey. It is a common wisdom that the pests love beer but it’s in fact the yeast in the popular beverage that attracts them. Which explains why yeast (with our without honey works too).

Put out a saucer filled with (stale) beer, or the yeast and honey mixture. Sink the saucer into the ground enough so the lip of the saucer is at ground level.

Slugs and snails will get into the mixture and drown. Empty and refill the saucer every couple of days.

  • Pro tip: A tin can or other kind of container works too. Do not put the edge to ground level to prevent that certain beetles and other beneficial insects tumble in.


13. Spear Some Snails and Slugs.

Get a flashlight and a long wooden Shish-ka-bob skewer and go out to your garden one evening to impale any snails or slugs you come across. When you are finished, chuck your skewer and impaled mollusks in the trash.


14. Dispatch them with Coffee.

Snails and slugs cannot tolerate caffeine, so you can deter them by placing coffee grounds around your plants, or spraying them with a coffee spray.

This is a much disputed anti-snail remedy. We have tried it ourselves without success. Snails and slugs just don’t seem to be bothered. This despite the fact that research demonstrates that caffeine indeed does kill slugs.

Scientists theorize caffeine acts as a potent neurotoxin thus causing the reduction in appetite and death.

Studies showed that a 1-2% caffeine spray was sufficient to kill slugs and snails. At lower concentrations, about 100 times weaker, the slugs lost their appetite.

Be careful with plants though, because although coffee is a natural substance,

“1-2% is a very high concentration of caffeine. That might be potentially damaging to plants and invertebrates other than slugs such as insects.”

Said Dr David Bohan, of the UK agricultural research institute IACR-Rothamsted to BBC News Online.


15. Deter them with Garlic.

Research published in the academic journal, Crop Protection has revealed that garlic kills snails and slugs. You can make a garlic spray and spray them when they emerge in your garden at night.


16. Deter them with Hair.

Go to your local barber shop and ask for some floor sweepings from the day. Put the hair around the bases of your plants.

The slugs and snails will get tangled up in it as they approach your plants. The hair will also add nitrogen to the soil around your plants as it decomposes.


17. Attack them with Salt.

Salt is a desiccant and will cause snails and slugs to dry out. Just don’t get too much of it on your plants, because it is not good for them, either.


18. Deter them with Epsom Salts.

Epsom salts (magnesium sulfate) sprinkled on the soil will help deter snails and slugs and also help prevent magnesium deficiency in your plants.


19. Destroy their Slime Trails.

Slugs and snails tend to follow each other’s slime trails. When you come across one, wipe or wash it away. This will help to keep a slug’s friends from following it.


20. Deter them with Petroleum Jelly.

If you see slugs or snails climbing up your plant pots while enroute to their dinner (your plants’ foliage), you can foil their plans by applying a layer of petroleum jelly around the bases and tops of your pots. The slugs and snails will have difficulty crawling over it.


21. Place Sawdust around Your Plants.

Snails and slugs find sawdust to be unattractive and will avoid crossing it unless they are starving. They also do not like to crawl over sand.


22. Save Your Salted Nut Shells.

Any salted nut shells can be placed around your plants. The edges are sharp and the shells are salty, which the snails and slugs do not like.


23. Place Bird and Insect Netting over Your Plants.

This may not deter slugs, but if your problem is primarily snails, their shells will get tangled in the netting.


24. Change your watering routine

If your watering schedule  involves watering your garden in the evening you may want to adjust. Slugs thrive at damp conditions and are most active at night.

Water in the morning instead, this will ensure the surface soil is dry by evening. Research indicates this can reduce slug damage by 80%.


25. Use Organic Baits on them.

Two of the best organic snail and slug bait products on the market are Sluggo and Escar-Go which contain iron phosphate.

When snails or slugs eat these baits, the iron phosphate interferes with calcium metabolism in their gut, causing the snails and slugs to stop eating almost immediately.

They die 3 to 6 days later. These products are safe to use around pets, humans, fish, birds, beneficial insects, and mammals.


26. Use Methaldehyde Baits.

If all else fails, treat them with methaldehyde baits. Metaldehyde is a molluscicide that attracts the pests and dehydrates the snail or slug rather rapidly if it eats this poison.

Slug and snail baits with metaldehyde are sufficiently toxic that they are not recommended for use around edible vegetables, and can be harmful to dogs, cats, and fish.

  • Safety note: commercial snail bait typically contains either iron phosphate or metaldehyde. Metaldehyde is poisonous to many living creatures, including you and your family. Iron phosphate only kills snails and slugs so this is the preferred first option.


27. Employ the ‘scorched earth strategy’

The historically proven military strategy to destroy anything that can be used by the enemy can be used here too.

Slugs and snails can quickly dry out and die on a hot sunny day. Especially if you limit the number of moist hiding places.

Get rid of ground cover by removing dead wood, rocks, by cutting back vegetation, and raising items in the yard off the ground. Place plant pots and storage sheds on blocks instead of directly on the ground.


28. Pick them up and move them

Transporting slugs and snails is probably the most eco-friendly solution. Moving snails just 20 feet (6.1 m) away from your garden apepars to be just as effective as termination.

Snails do have a homing instinct, which means they tend to return to their home colony (your yard), especially during the summer and specifically in the autumn for hibernation.

Nonetheless, studies show little benefits to a gardener from killing snails.

Snails casually found and killed are only a small sample of a much larger population.

This means you either have to declare war on the slimy foes by deterring and killing as much as you can, or be prepared to make considerable efforts in moving snails consistently.


29. Install an electronic slug fence

Another safe, non-toxic method to keep slugs from eating your precious heirloom vegetables (or any plants in your yard for that matter).

The Slugs Away fence is simple yet effective 24-foot long barrier that runs off a 9 volt battery.

Contact with the fence causes slugs to turn back (it doesn’t kill them). The battery powers the fence for about 8 months. Safe for use among humans and pets.


30. Use pine seed extract

Pine seed extract offers another useful eco-friendly solution. The substance is also used in commercial, dynamic horticulture. Application of a high dilution (3:1000) is a non-lethal method to keep slugs at a distance.


31. Rhubarb leaves

Got a large yard? Chances are  there’s a rhubarb plant in it too. You can pick some leaves and place them on the ground around the plants affected by slugs. Be careful as rhubarb leaves are toxic and ingestion can cause health problems.


References

Snails home. D J Dunstan1 and D J Hodgson2 Published 15 May 2014 • © 2014 The Royal Swedish Academy of Sciences,  http://iopscience.iop.org

Methaldehyde. A Pesticide Information Project of Cooperative Extension Offices of Cornell University, Michigan State University, Oregon State University, and University of California at Davis, http://pmep.cce.cornell.edu.

Control Measures for Slug and Snail Hosts of Angiostrongylus cantonensis, with Special Reference to the Semi-slug Parmarion martensi, http://www.ncbi.nlm.nih.gov/.
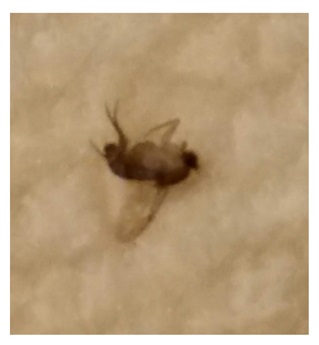
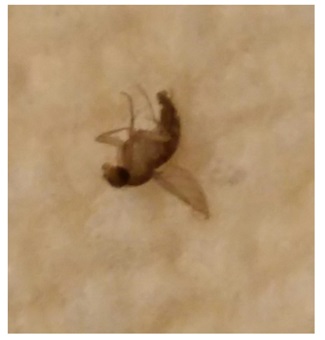
 

What’s This Bug? Tiny Brown Flying Bugs In Car

tiny-red-bugs-in-car
tiny brown bug in car
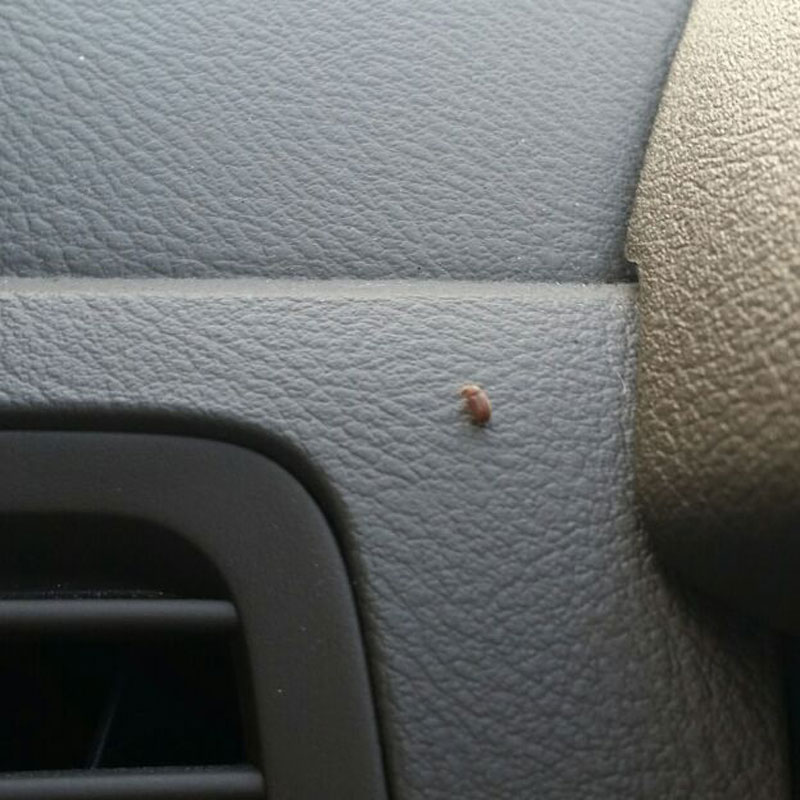
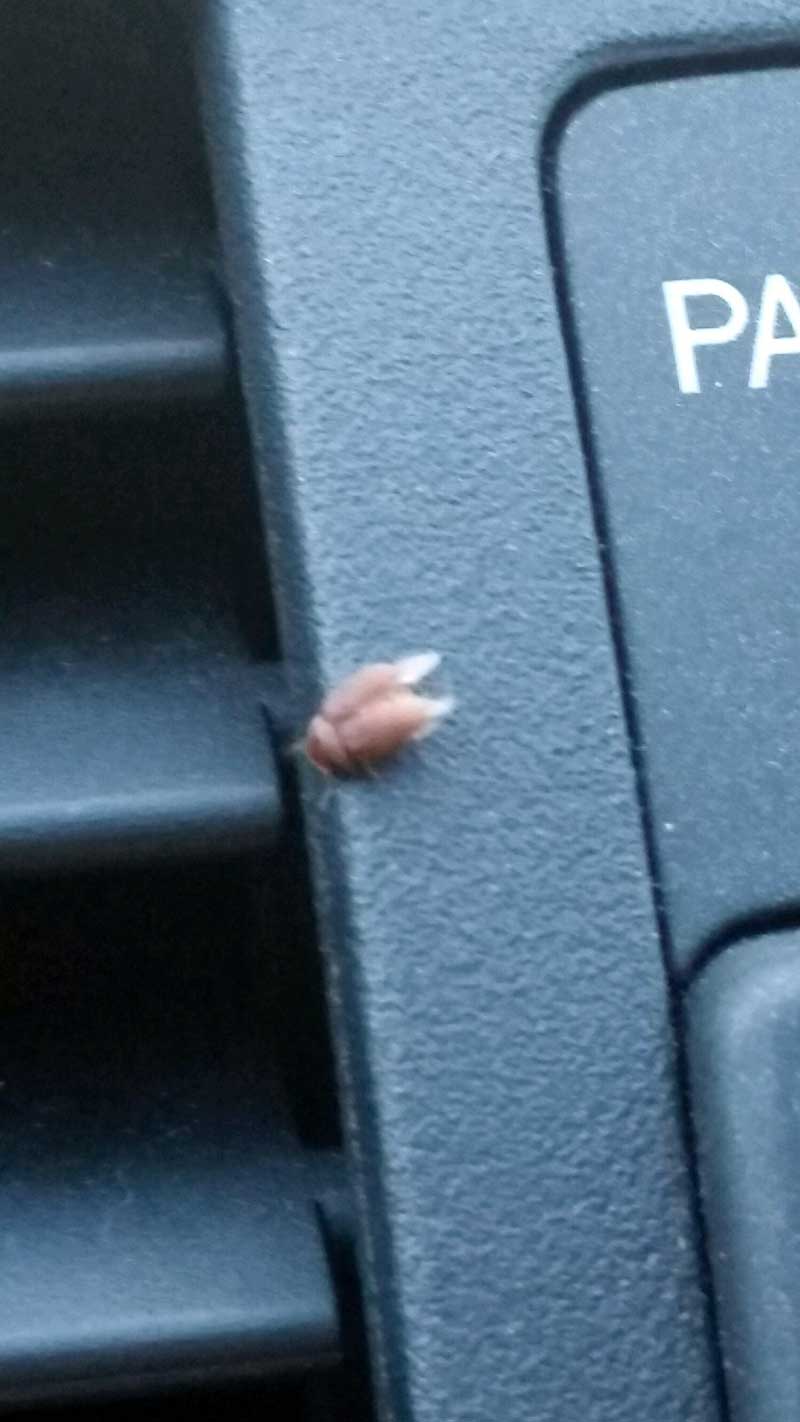
They are the size of a gnat and resemble the beetle


tiny-red-bugs-in-car1
car invested with tiny flying bugs

What:

“My husband and I both have little tiny brown flying bugs in our cars. We are actually infested with them in our cars.”


Where:

We live in South Florida and have tons of Palm trees in our yard that we park under.

I suspect it is related to the trees considering both of our vehicles have been invaded. These little critters are entering the cars in the little holes where the dash meets the hood.


Do you know which bug this is?

Help Shannon and her husband identify this pest.

Drop your comment below.


Got an ID request yourself?

Are little insects bugging you? Are you itching to know which bug you are dealing with?

  • Send a clear picture to dd2 [@] live [dot] nl.
  • Mention size. For instance 2 mm.
  • If possible with something for scale in it. Or something on the background. A remote control, a coin, or a banana if  you must.
  • Mention where you encounter the bugs. For example; in your living room in Carlsbad, California.
  • Mention characteristics. Do they fly? Do they bite?


We will post your pics here and help you determine what you’re dealing with.

12 Ways To Protect Your Baby From Mosquitoes

Mosquitoes are maddening enough for adults: think how much worse they torment babies. With their delicate skin and lack of mobility, babies are perfect prey for bloodsuckers.

Moreover, babies and children are typically bitten more by mosquitoes than by any other type of insect.

Here are proven tips on how to protect your baby from mosquitoes.

1. Keep your baby away from mosquitoes

Timing and location are essential. Your primary aim should always be to keep mosquitoes away from your baby as well as your baby away from mosquitoes.

That means keeping babies inside at peak biting times (usually dawn and dusk), and staying away from pools of still water where mosquitoes breed. Also flower gardens and unconvered foods attract skeeters.

Check your house and yard for stagnant water – a puddle in a blocked gutter can harbor thousands of mosquito larvae.

While you’re at it, take other measures to mosquito-proof your yard too.


2. Use screens and nets

Window screens stop the little blighters from flying into the house, and a net around your baby’s crib or play pen will stop any that get past the screen.

For travelling around, you can buy elasticated mosquito nets which fit snugly to a pram, stroller or car seat.


3.  Keep the air moving

Insects find it hard to navigate when there’s a breeze, so try using a desk fan rather than turning on the air conditioning or opening the windows.

Research shows that fan-generated wind is a practical means of protecting from mosquitoes.


4. Use traps and repelling devices

Ultrasonic pest repellers, such as the popular Rid-Tech Ultrasonic Pest Repeller, work wonders according to many people. Critics claim these devices are useless but the abundant positive reviews indicate otherwise.

Added benefit of these ultrasonic devices is that they repel other bugs you don’t want near your baby such as spiders and scorpions too.

Another popular option are electronic insect zappers. Obviously you don’t want to hang a big bug-zapping lightin your baby’s room but placing one outside near the nursery can help reduce the amount of mosquitoes swarming nearby.

Here’s an overview of the best bug zappers available.


5. Use insect-repellent flowers

Chrysanthemum flowers provide an unexpected alternative: they give off a natural variant of the chemical repellent picaridin. And happily, a vase of chrysanthemums looks much nicer in your baby’s room than a buzzing blue trap.


6. Cover up

When your baby is outside, try to cover as much of their skin as possible, including their head and feet.

Socks under sandals, hats with flaps, long-sleeved t-shirts and trousers – the more clothing, the better.

Mosquitoes can bite through knitted clothing but have trouble with woven fabric, so a stiff cotton shirt will provide more protection than a stretchy swimsuit.

make sure as little skin is exposed where mosquitoes are present

7. Dress your baby in neutral-colored clothing

Dark or bright-colored clothes and/ or flowery prints can make your baby more vulnerable to sight hunters so add an extra layer of protection.

Beige, khaki, olive and other neutral colors do not attract (or in lesser degree) insects including mosquitoes.


8  Avoid using scented lotions or soaps

There are hundreds of different species of mosquito – some find their prey by sight, others sense the carbon dioxide on your breath, others are attracted to the smell of a human body.

Strong-smelling skincare products can attract the mosquitoes which hunt by scent.


9. Use synthetic repellents

Once you’ve cleared mosquitoes away from the area and wrapped your baby in layers, chemical repellents are the final step to deter any remaining mozzies.

The insecticides DEET and picaridin can both be used on babies from two months old.

Mosquito repellents are rated by the percentage of active ingredient they contain – usually 5% to 30% for DEET, 7 to 20% for picaridin.

Popular choices are;

  • Premium Insect Repellent with 20% Picaridin by Sawyer Products
  • Repellent products with that contain up to 30 percent DEET


A higher percentage doesn’t mean that the repellent is more effective, only that it lasts longer.

Insect repellents are safe if used as directed, so always remember to follow the instructions closely.

Apply repellent sparingly to your baby’s exposed skin, do not apply to the skin underneath his or her clothes.

Spray the lotion onto your own hands before rubbing onto your baby’s exposed skin, so there’s no risk of them inhaling the vapor.

Avoid rubbing repellent too close to your baby’s eyes, mouth, or ears, and keep it off his hands in case he sucks on them.


10. Think about sunscreen

Some products contain both bug repellent and sunscreen, which is a convenient way to protect your baby quickly before short trips outside.

They aren’t recommended for longer periods of time, because sunscreen needs reapplying far more frequently than insect repellent.

The American Academy of Pediatrics advises against using products that combine sunscreen and DEET because:

DEET should not be applied more than once a day in children.

WebMD refers to as study that showed that combining sunscreen with DEET caused the skin to absorb the insect repellent more than three times faster than when used alone.

If you’re planning to apply sunscreen and insect repellent separately, make sure to apply the sunscreen first – otherwise it can mask the effectiveness of the insect repellent.

An often recommended bug spray with SPF for babies is Avon Skin-So-Soft Bug Guard plus Picaridin.


11. Try a natural alternative

Many parents are wary of using strong chemicals on their baby’s delicate skin, and everything from olive oil to woodsmoke has been recommended as a natural mosquito repellent.

Oil of lemon eucalyptus, or PMD, is the only alternative remedy recommended by the American Centre for Disease Control. It has been proven to be as effective as DEET, but needs reapplying more frequently.

  • Officially, it isn’t recommended by the CDC for children under 3: this is because it hasn’t been tested on babies, not because it is believed to be dangerous.

Repellents containing oil of lemon eucalyptus are sold under the Off! Familycare Botanicals as well as Cutter and Repel Natural brands.

Other science-backed plant-based mosquito repellents include neem, catnip, hairy basil, and verbena; carriers such as coconut oil, soybean oil, and vanillin can help to boost their efficiency.

These pungent plants can reduce bites by 70-100%. The problem is that many natural remedies are effective against only certain species of mosquito, unlike synthetic repellents which repel all types.


12. Treat your kid’s clothing

To reduce the risk of bites still further, you can apply repellent to your baby’s clothing as well as their skin. This can be as simple as spraying your baby’s clothes with the same repellent you’re applying to their skin.

For a longer-lasting solution, you can treat their clothes with permethrin; the chemical is odorless to humans and will repel insects for 5-6 washes.


The bottom line

Physical blocks like nets and fans will keep away most of the mosquitoes, and insect repellent are likely to do the rest. Be smart about where and when you take your baby as well as clothing and skin care products you use.

Enjoy summer with your baby this year, instead of worrying about bug bites and diseases.


Not Recommended


Citronella candles

In studies, citronella candles and torches have been shown to ward off the little blood-suckers to some extent. These candles produce smoke that confuses mosquitoes, thus interfering with their ability to smell us and find us.

There are some considerable downsides though.

Research also shows that their range of effectiveness is very limited, less than 2 metres and then only if there’s no breeze.

What’s more is that research has found that there are large particles in the smoke these candles produce.

These aerosol emissions may raise concerns about how safe it is to regularly breathe in this smoke. Not something you will want to burn in your baby’s bedroom.


Image: sabianmaggy

14 Termite Prevention Tips

How do you prevent termites from damaging your home? They are called ‘silent destroyers’ because they may be tearing up your house without you noticing any signs of destruction.

So often you don’t know that you have termites. Still, there are various things you can do to inhibit the threat.


Experts estimate it generally takes 3 to 8 years for termites to cause considerable damage although some of the more destructive termite types can cause major structural damage in as little as a few months.

They are significant pests because of the severe damage they can cause to wooden structures such as your home, the fence, a barn or what not.

Termites can be very destructive

How to recognize a termite infestation

You can generally recognize a termite infestation by watching the insects swarm, by noticing “the flying ants in spring”,  by noticing the mud tubes they build as they forage for new food sources, the bubbling paint on the walls, and by noticing damaged wood where termites have been active.

  • Termites generally are about the size of ants, are white to tan in color, have long segmented bodies, round heads with two prominent antennae attached, and six legs.


How to Prevent Termites: 14 Tips

Below are 14preventive measures you can take to guard your house and property against termite infestations. You may use these tips to help keep termites away from your property.

1. Identify and fix all water leaks in your home, both inside and outside

Termites need water (even drywood termites need water), and if the water source comes from your home, the colony will not have to work as hard to get water. Eliminating their water source might induce them to look elsewhere to establish their colony.

  • Repair leaking water pipes, A/C units, and faucets.
  • Seal entry points around water and pipes or utility lines.
  • Divert water away the foundation of your home.

2. Eliminate any standing or pooling water from around your home

This might include installing French drains that allow water to percolate into the soil more quickly after a rain storm so it doesn’t pool near your home’s foundation.

It also means getting rid of standing water on the roof and other locations. This measure will help reduce mosquitoes in the yard too.

3. Keep all rain gutters and drain lines clean of debris

Gutters serve to efficiently convey water from your roof away from your home. Clogged gutters and drain lines leak, and allow water to pool in the gutters along the roofline and on the ground near the footers of your home. Make sure your gutters are serving their purpose.

4. Remove any brush or heavy growth from around your home

Vegetation can create areas of trapped moisture which termites can then use to support their colony. Vegetation can also facilitate a pathway for termites to find new wood to feed on (like your home’s wood siding).

Therefore, keep the area around your foundation raked and clean to enable proper drainage and keep your shrubbery trimmed back from your home’s exterior walls.

5. Seal potential access points

Proper sealing/caulking of any openings on the outside of your home can help limit the access to your home’s interior by termites.

Therefore, seal any holes, cracks, open seams, and fissures in places such as your foundation, footers, between siding boards and window-frames, etc.

Place screens on outside vents. Remove vegetation growing over vents.

6. Install physical termite barriers

There are various options:

  • Chemically treated soil (a.k.a. chemical termite barrier) around the outside of your home. Deadly to termites, safe for humans, pets and other animals. Generally, 3 types of chemicals are used; Fipronil, Bifenthrin and Imidacloprid. These are sold under the brand names Termidor, Premise, Prothor or Biflex.
  •  A physical barrier between the soil and the home often in the form of a stainless steel mesh. These barriers will help keeping termites at bay but are not 100% effective.
  • A combination of both in the form of a chemically treated physical barrier. For instance a layer of chemical-treated webbing sealed between two sheets of plastic.


7. Ventilation

Make sure your home is properly ventilated, including your attic and any internal crawl space areas. Adequate airflow prevents the buildup of moisture needed by termite colonies.

8. Remove dead trees, old stumps, or roots in your yard

As these decay, they provide food and habitat for termites. When the food is gone, the termite colony will look for new sources of food, including your house.

9. Never bury waste lumber or wood scraps in your yard

This will attract the termites and serve as a beacon for them to become established on your property.

10. Do not allow excess building materials or firewood to be stacked against your house

Remember, termites are attracted to wood. Why offer them an appetizer, and a bridge to a main course (your house)? Scrap wood touching the ground is an open invitation to hungry termites.

Keep  firewood at least 20 feet away from the house.

If your property is not large enough for wood storage away from the house, put a barrier beneath the wood to prevent direct access by the termites.

Stack the wood on a concrete slab or on a heavy metal stand that raises the wood off the ground (this will also help keep the wood dry and ready to be burned in your fireplace).

11. Use termite-resistant wood for any wooden structures that will have direct contact with the ground

Unprotected wood used for outdoor decks or landscaping is vulnerable to damage by termites. Over 90% of all termite infestations start from wood-soil contact.

If possible, keep an 18-inch gap between soil and your home’s wood structures.

Naturally termite-resistant wood types include redwood, cypress, and cedar.

Treated lumber includes pressure-treated pine, which is extensively used in the Southern U.S. for fences, decks, gazebos, etc.

Treated lumber is more long-lasting than naturally resistant wood.

The chemicals in treated lumber do not guarantee that termites will not invade the wood, but they can act as a deterrent for several years (whereas untreated pine might last just a few seasons).

Home improvement centers now offer concrete supports that raise the wooden support beams for decks and patios off of the ground.

You might also use composite boards in your deck or fence-construction in lieu of wooden boards. Composite boards are composed of woodchips and/or sawdust and plastic, and offer superior termite-resistance, compared to wood.

12. Avoid using mulch near your home

Mulch does two things for termites: (1) it provides a food source, and (2) it collects moisture, providing them with their water source.

If you place mulch too close to your home’s footers, it is only a small step for a termite colony to move from the mulch into your walls.

As an alternative to wood mulch, try using rubber mulch (made from shredded used auto tires). Rubber mulch provides the utility of natural mulch without the risks.

13. Periodically have your home inspected for termite damage

An annual termite inspection can save your home with early detection. Also, a trained pest control specialist can offer recommendations to help you prevent a termite invasion.

They also might find something that your own termite-prevention measures missed.

14. Special notes on Formosan Termite Prevention

The worst of any termite species is the invasive Formosan Termite, which is likely a native of southern China.

Formosan Termites have spread to many areas of the world, including the United States. These termites are subterranean termites, and what separates them from other subterranean termites and makes them much more dangerous to structures is their colony size.

A standard native subterranean termite colony might number a couple hundred thousand termites, while a Formosan Termite colony can number millions of termites.

They make a much larger infestation and can destroy wood at a faster rate. Their colonies extend for hundreds of feet underground from their food source, so this makes eradication efforts very difficult.

Formosan termite prevention includes all steps used for native subterranean termites, and one other thing:

Be on the lookout for extensive networks of soil-tubes climbing basement walls or other non-wood surfaces, which the termites build in their search for new wood to invade.

Types of termites

Termites in the United States are generally of four types:

  • Subterranean termites,
  • Drywood termites,
  • Dampwood termites,
  • Formosan termites.

Subterranean termites make their nests underground and emerge to attack wood they can easily reach. These termites are the most common cause of termite infestation.

Drywood termites remain entirely above ground and do not connect to the soil—infesting dry wood, such as structural lumber, dead limbs on trees, utility poles, decks, fences, lumber in storage, and furniture.

Dampwood termites are most often found in cool, humid areas along the coast, and infest decayed wood that remains moist from water contact.

Formosan termites are subterranean termites from Asia—now in 11 states in the U.S., and known to establish huge colonies that voraciously feed on the structures they attack.

What did you do to inhibit these little buggers from destroying your home?

Got questions? Want to share your experiences? Share your thoughts below.


References

Termites.com. (2015). Formosan Termites. http://www.termites.com/types-of-termites/formosan-termite/

UCIPM. (2014, May). Subterranean and Other Termites. Retrieved from http://www.ipm.ucdavis.edu/PMG/PESTNOTES/pn7415.html#MANAGEMENT

How To Get Rid Of Mice In House Without Killing Them

It’s a cold hard fact, winter weather drives mice and rats into our homes. In fall, with cooler weather moving in, several critters will be dying to invade your home to stay nice and warm.

Mice breed fast and one mouse taking up residence in  your home may result in a populations that exceeds 200 specimens within a matter of months.

Thinking about it just makes you want to curl up in bed, feet safely off of the floor until you can come out of hibernation in the spring. If all you had to go up against were a few ants and the occasional spider, it wouldn’t be so bad.

It’s those squirmy little mice that you dread. With beady eyes and worm-like tails, they infest the walls and comfy corners of your home without a second thought of consideration towards you and your family.

How will you keep these pesky rodents from bedding down and chewing up the walls of your home?

It makes you wonder, are there effective ways to get rid of mice naturally? To get rid of mice without killing them.  After all, you don’t want a bunch of dead mice laying around, rotting behind the cupboards or walls causing an odor problem.

Obviously you’re not looking for woolly methods unrealistic treehuggers would use but a humane way to get rid of the pest that actually works.

Here are your options. Keep in mind that although popular, they are not evenly effective. We have listed pros and cons of each method.

The first and most important step is prevention.

How to prevent mice from entering your home

As soon as summer months start to slip away, it’s time to start thinking about your strategy for keeping mice out of the house.

Create barriers and block any entrances. It’s a tough job, but somebody’s got to do it because once mice have settled in they can be extremely hard to get rid of.

Mice commonly have their nests in attics, lofts, storage boxes, and wall interiors.

The first step in mousy warfare is to work from the inside of your home out to block any holes and tunnels mice have created to get in.

How far should you go in blocking holes?

Key here is to seal up every opening mice could enter your home through.

  • Repair holes in outside walls, floorboards or skirting boards. Fix broken air bricks.
  • Tidy up cupboards.
  • Remove nesting material.
  • Inspect if doors (especially the garage door which is often the main entrance for mice) seal well. If not make sure to ensure it does seal well.

Keep in mind that the common house mouse (Mus domesticus) is approximately 2 inch long and weighs about an ounce allowing it to sleep through openings just slightly larger than a pencil.

Mice can enter through extremely small holes.

Other common, uninvited guests are yellow-necked mice, wood mice,  and brown rats.

What to use as blocking material?

Depending on the size of the hole, you can either block it with something like a scouring pad or dish sponge, or you may need to repair the hole by filling it with plaster or caulk.

Steel wool for smaller and wire mesh for bigger holes if generally recommended by pest control professionals.

Either way, by starting from the inside of the house and working your way out, mice that are attempting to get in through the blocked holes will probably give up and exit through the outer holes on your house.

Make sure you’ve sealed all holes inside before starting on the outside

You can easily find entrances where mice have tunneled through by checking for droppings, stains and undesirable smells these rodents leave behind.

Once you’re sure the mice have fled the scene, start on the outer walls and seal them up to prevent curious mice from coming back and tunneling a new hole.

Keep your home tidy

Mice love nothing more than a dirty house. Not only stinking garbage but even lingering food crumbs make your home an open buffet for these little critters.

You can easily prevent mice in your home by making it as unappetizing to them as possible.

Make sure all the surfaces in your home are clean and that food is not left laying around in the open air where mice can smell it.

Mice don’t roam large areas. They generally nest near their food source, so the critical element of effective mouse control is to find their food source. Once their food source is removed the mice can not survive.

Keep your floors swept to reduce food particles laying around and vacuum at least once a week. You might not see any crumbs in the carpet, but even a tiny fleck of a Cheeto can be detected by mice.

Keep pet food and grass seed in closed containers that mice aren’t able to chew into.

Change garbages often and keep your outdoor ones a safe distance from your home. Garbages are like homing beacons for mice.

Use smells that mice hate

Although garbages may ring the dinner bell for mice, some sources claim that mice absolutely hate certain smells and as a result will stay far away from them.

Often recommended is peppermint oil which is a natural solution that supposedly repels mice with its strong scent. Mice have extremely sensitive noses, so any smell they don’t like hits them much harder. Peppermint oil will also keep insects out of your home, especially spiders.

Simply place cotton balls with a few drops of real peppermint oil on them around your home; target areas where you suspect mouse activity.

Natural home remedies that involve cayenne pepper and Tabasco sauce are also helpful because of their spicy scent.

Garlic salt will keep rodents away for a time, but eventually they’ll work their way past it. Stick to stronger scents to deter mice. They’re not only organic, but they won’t harm the mice if that’s something you wish to avoid.

The downside of using sprays or scents is that these are not science-backed solutions. They are not generally recommended by professional pest control companies.

Mice may find the smells irritating but they will be able to find their way around them so these are not a viable solution when it comes to natural ways of getting rid of mice.

Use electronic repellents

Along with a sensitive nose, mice also have excellent hearing that makes them susceptible to high-pitched ultrasonic waves. At least, that’s the theory.

Using sonar repellents such as the well-reviewed Rid-Tech Ultrasonic Pest Repeller is a humane solution to mouse traps and poisoned baits.

However, mice can become accustomed to the sounds of ultrasonic devices and will eventually ignore them.

There’s also the fact that the sound is blocked by walls and furniture, thus diminishing their effectivity.

There’s little to no scientific evidence that high frequency sounds emitted by electronic mouse repellents are effective.

Electronic devices may an effective solution, but only temporary.

The best way to get rid of mice without killing them

Poisons and inhumane mouse traps will leave a litter of little corpses around, which isn’t healthy for anyone involved. Another downside of poisons; they are bad for mice so they are for children and pets too.

There’s also the fact that traditional mouse poisons cause internal bleedings in the mice klling them slowly and painfully which puts many people off.

Luckily, there are more friendly ways to keep mice away that don’t involve toxic chemicals and your own personal mouse graveyard.

Non-lethal mouse traps

photo by Roger Arquer

If you find yourself with a mouse infestation that needs more than preventative measures, trapping the mice with non-lethal devices will help you cut down the population.

Live-catching mousetraps are your best solution in case you don’t want to kill mice. Some of these traps attract mice via food baits. Once the mouse is inside a door will snap closed, capturing the critter.

Mouse traps are very effective, especially in capturing individual specimens. Make sure to be early in attacking the problem though, once your house has been infested, more extreme pest control measures may be necessary to get rid of the problem.

There are many different kinds of traps. Some devices are available to purchase at a store or online, while others are easy to make yourself at home.

  • The downside of trapping (inhumane and humane) is that it takes more effort than, for instance, using poison.
  • The advantage of this method is that it allows you to catch and release mice without having to touch them.

Where to  place traps?

Place traps wherever there are mouse droppings. Commonly behind appliances and throughout the home where the walls meet the floor.

“You want them perpendicular to the wall, with the baited end closest to the wall,” Mr. Martin of pest control company Terminix said to the NY Times.

Use an attractive bait

Mice will nibble on pretty much anything, but it helps to use one of their favorite foods.

The mouse love cheese myth

Cheese is surprisingly not as attractive to them as cartoons make it out to be, but if you use a strong enough cheese, it may work better.

  • Use foods like saltine crackers, peanut butter and small seeds or nuts. Anise seeds are particularly effective.
  • You can also use bait foods that are sweet, like chocolate or candy. Mice like sugary foods, so don’t hesitate to lay down some Nutella spread.
  • A cotton ball with a few drops of vanilla flavoring is attractive to mice too.
  • You can even use wet cat or dog food to lure them in.

Where to set the mice free?

Whatever method you choose, removing the mouse from your home must involve dropping them off at least a mile away from your house. Mice, much like squirrels, will find their way back if released too close to home.

With a few mice gone, the food supply suddenly becomes larger for the remaining mice, and they generally take the opportunity to stuff themselves full and breed.

This results in a larger mouse population and only serves to aggravate the problem. Here are a few trap methods you can use to discreetly and humanely remove your mouse problem.

Which mouse trap should you buy?

Buy a trap endorsed by animal rights groups. Whether you’re a fan of PETA or not, they do have some pretty effective traps on their website.

You can also check on sites like Amazon to see if PETA or The Humane Society have put their seal of approval on the contraption you’ve picked out.

One of the cheapest and most effective humane traps is from Seabright and is called the Smart Mouse Trap, and you can buy it on Amazon for around $14.

Although it’s not meant to trap bigger rodents such as rats or squirrels, it is very useful for live-trapping mice that make their way into your home.

There’s no poisons or snap traps involved; all you have to do is put your choice of bait (they suggest a saltine cracker for this one) into the trap and the door will close when the mouse takes the bait.

You can reuse it as many times as you want to, so it not only keeps the mouse alive, but it saves you money in the long run.

Make your own trap

This method takes a little more ingenuity on your part, but it’s the cheapest option available. A common method is to use a large bucket with slippery walls that the mouse can’t climb up once they’re inside.

A precariously balanced cup tied to the sides with string works fairly well, or you can get an old aquarium (choose a fairly large one) and put the bait directly inside.

The mouse will climb up the makeshift ramp or ladder you put against it and jump down into the aquarium, but it won’t be able to get back out because of the slick glass walls.

You can also prop up buckets with coins or an empty toilet paper roll so that the mouse’s movements set the trap off. The bucket will come slamming down, trapping the mouse inside without harming them.

Bottom line

Putting any of these methods into practice will not only get rid of your mouse problem, but it will also ease your conscience knowing that you’ve removed the problem without causing harm to the animal.

Non-toxic, non-lethal methods do better in the long run to both protect your family, as well as the mice, from harmful chemicals and pesticides.

But in the end the key thing is to get rid of the mice one way or the other, if only because they are key hosts of ticks that may carry Lyme disease.


Photo credit: Roger Arquer.

17 Ways To Avoid And Treat Ticks On Humans

A silent predator is stalking you, and it’s rarely bigger than your pinkie nail. This predator, of course, is the tick.

Aside from having a nasty bite, these little buggers can carry debilitating diseases, such as Lyme disease and Rocky Mountain spotted fever.

I have experienced from up close which devastating  effects a single tick bite can cause. My ex girlfriend never knew she had been bitten by a tick but gradually and steadily she entered the world of Lyme disease.

My ex gf had to endure all kinds of horrible chronic conditions, from nerve pain to just feeling sick to a facial paralysis (half her face was paralyzed but luckily that was cured eventually. Which can not be said of all her ailments. So take tick prevention seriously because what these little bugs can cause is creepy as hell.

You’ll need the proper tools and know-how to avoid them, but should you find a little bloodsucker that’s grown abnormally “attached” to you, there are solutions for treating tick bites on both you and your loved ones.

12 Tick prevention tips

For those who love the outdoors, it’s difficult to avoid finding yourself besieged by the insect world, but there are some easy ways to keep ticks off your back (and other places).

Cover exposed skin

This is tough to do in the summertime when temperatures are hot and sticky, but making sure you wear your socks up over your pant legs will keep ticks from crawling up underneath your clothing.

When the summer rays cool off into fall, long-sleeved shirts will be a must. You should also wear a hat to keep ticks from getting the drop on you. The scalp is a very common place to find ticks, so protect your head and your brain with a sporty cap.

Keep it bright

Speaking of clothing, make sure you wear lighter colors when out and about. Ticks can be really small, but you’ll have an easier time picking them off of you when they clash against the sunny yellow t-shirt you’re wearing.

Although these shades will get dirtier faster, it’ll be worth it to spot this secret assassin when it’s crawling on your sleeve.

Savor the sunlight

Those bright UV rays may be good for something yet. Ticks hate the sunlight because of how easily dried out they can get.

Ticks tend to stay in the shade where cooler temperatures allow them to move about more freely. Though you should be safe while getting that summer tan, make sure to stay far away from shaded areas if you aren’t wearing protection.

Don’t let your pets make friends

Keep rodents like mice and squirrels out of your yard. Though Fido might make you proud as he wrestles another varmint into submission, ticks can hitchhike from one animal to another. Subsequently your pets can bring ticks into the home.

Always check pets that have been outside during warmer months before they come inside. Use collars such as the popular Bayer Ceresto flea and tick collar to prevent ticks from biting your dog.

You don’t want to invite unwanted guests, so give Fido a good rinsing or comb-through. Here’s a big list of tips on how to prevent and treat ticks on pets.

Avoid thick foliage

Ticks are most likely to latch onto your clothing from a nearby tree or bush, from there they crawl up to find a place to bite. So walking unprotected through woodland areas where you’re constantly brushing up against them is a bad idea.

Stick to well-worn paths and wide open areas to avoid ticks. When camping, make sure you don’t sit on the ground. They can crawl up from there too. Pack a few folding chairs and use camping ground tables and benches when available.

Ticks don’t fall from trees. It’s a myth. 

Check yourself and check often

Though the vast desert of clothing layers may seem time-consuming to cross, a tick can get to your skin quicker than you know. The going is slow, but once they get to you, they will chomp down and attach themselves to your skin.

Do a tick check every couple of hours, both on yourself and those with you. Areas such as armpits, waistlines and behind the knees need extra vigilance. If you find any ticks, remove them immediately.

Leave ticks high and dry, wear quick dry clothing

Ticks can’t stand the heat. It’s a wise practice to throw your clothes in the dryer when you get home to zap any clingers-on that may have attached themselves to you.

Even if you don’t see any on your clothing, making doubly sure they’re thoroughly baked will set your mind at ease and prevent the spread of ticks around your home.

Take a shower

You’re tired from a long day hiking, so why not soothe those sore muscles with a relaxing, hot shower?

Ticks that get under clothing but haven’t attached themselves yet can be washed off with a hot rinse. Drowning them in a few suds from a heavily-fragranced body wash wouldn’t hurt either.

Keep an eye out

Ticks are very sneaky, but they’re not entirely invisible. If you spot a tick in the great outdoors, don’t let your neighborly side get the best of you; avoid that tick like it’s the plague because it’s most likely carrying one.

Use insecticide

Having the right tick repellent can mean the difference between staying safe and coming home with a new eight-legged friend.

Use a repellent with higher levels of permethrin. It has a slight citrus scent, so you don’t have to worry about compromising reeking like a chemical plant with being protected.

Permethrin will not only keep the ticks away, but if any do happen to get close, it will kill both adult ticks and juveniles. Popular choices are Repel 100 Insect Repellent and Sawyer Products Premium Permethrin spray for gear and clothing.

Wear permethrin-treated clothing

Several outdoors-centric stores such as Cabelas will sell this type of mosquito-repellent clothing. It gives an added layer of protection in the fight against the creepy-crawlies. Used in conjunction with insecticide, ticks will have a tough time getting close to you.

Spray your yard

Using a deterrent to keep ticks out of your yard in the first place can make playtime for your children safe again. You can either spray yourself or get a professional to do it.

Either way, by spraying especially woodsy areas and ornamental plantings you’ll be putting up a sound barrier against an army of ticks and other pests.

The most commonly used products include Talstar Pro multi-use insecticide and Permethrin SFR. Works great to reduce the local mosquito population too.

Treat your yard with Tick Tubes

These contain tick-killing permethrin treated cotton that mice like to steal to line their nests. Mice and other small rodents like chipmunks are key hosts for ticks.

Especially for wooded yards with plenty of shrubs and other foliage, Tick Tubes provide an effective first line of defense.

Treat your yard with granules

Get Ortho Bug B Gon Max Insect Killer for Lawns or another brand to get rid of all kinds of bugs including ticks, ants, spiders, and fleas.

Make the  yard less habitable for ticks

Trim tall grass and weeds and rake and remove leaves and clutter to minimize tick habitat. Widen walking paths, trim back tall grass and brush, and make sure to walk in the middle. Treat the sides with tick-killing sprays or granules


Here’s the tough part: what do you do if you find a tick attached to you?

How do you remove it? Ticks are surprisingly stubborn and strong, and once they’ve got a good chunk of your flesh in their tiny, disgusting mouths, they don’t want to let go.

You need to remove the tick, and fast. If the tick isn’t removed within a certain time frame, severe infections can occur, leading to hospital visits and further complications.


5 Tick removal tips

Tick bites are nothing to joke around about. Here’s what you can do if you find a tick attached to your skin:

Get the tweezers

Try and grab the tick as close to the skin as possible. This can be difficult, especially when the tick is very tiny. When removing the tick, attempt to get the whole insect off in one go rather than plucking off only part of it, leaving other parts still attached.

Granted, they’ll come off eventually (the individual parts, that is), but removing the whole tick on the first go is better to prevent infection leaked through teeth and glands that are left behind.

Use a tick removal tool

If you find using tweezers difficult or scary (some folks are afraid they might do it wrong) you can use a special yet simple tick removal tool.

Popular brand names include O’Tom tick remover, Tick Twister, TickEase Tick Remover, and Ticked Off Tick Remover. These tools are commonly used for dogs, cats, and other pets too.

A simple trick to take the fuss out of removal

If you’re having a hard time removing this unwanted parasite, slather a smothering substance such as Vaseline over the tick (chemicals are not a recommended substance for tick removal).

This will suffocate it in a matter of minutes, and you can easily remove it with a pair of tweezers.

Take the subject into custody

When you do get the tick removed, place it in a sealed container (a jar or plastic bag will do just fine as long as it seals properly). This is merely for your own peace of mind.

Some people think they should take the tick to their doctor. The underlying thought is that if the tick has a disease, the doctor will be able to tell you what it is and what course of treatment you should take.

Some local or state health departments do offer tick identification and testing as a community service but this is generally not recommended by the CDC.

  • This because if the tick shows to carry a disease this does not necessarily mean you have been infected.
  • The other way round, negative test results are no guarantee you have not unknowingly been bitten by another tick.
  • Waiting for the test results can delay treatment because you may develop symptoms before the test results are available.

Watch for signs of illness

Being bitten by a tick puts you at risk of contracting whatever disease it happened to be carrying, but you can also contract other diseases as well. This is why it’s important to keep the tick for your doctor’s visit should you happen to capture it.

Depending on the type of tick and if it’s carrying a disease, you may display different symptoms such as fever, chills, rashes and assorted aches and pains. If you see any of these symptoms, get to a healthcare facility immediately.

A lady from Oklahoma who contracted Rocky Mountain spotted fever sought treatment too late, and she ended up having all four limbs amputated. The sooner you are treated, the less you’ll have to deal with later.

Bottom line

Nowadays, mosquitoes aren’t the only annoying parasite you have to worry about when you step out your door.

Keeping you and your family safe from ticks is as simple as following these steps. Enjoying the great outdoors doesn’t have to be difficult; just make sure you’re taking the right precautions, and you will remain healthy and tick-free.

15 Tick Treatment And Prevention Tips For Pets

Ticks are nasty little things. Not only do they make your pet uncomfortable, they also pose a threat to human health.

Illnesses like Lyme disease are transmitted by their bites, and can affect humans as well as animals. So here are 15 tick treatment and prevention tips for pets.

Tick prevention tips for pets

There are various ways to protect your pets from tick bites. Each has it own pros and cons.

1. Be selective in where your pet roams

Ticks usually live in long grass or low-level foliage, and grip onto any host who brushes past.

Keep pets indoors isn’t realistic.  In late spring and summer, when ticks are most active, walk your dog in the street rather than letting them run free in the countryside.

2. Tick-proof your back yard

Of course, it’s not always practical to keep pets cooped up. There are ways to make your yard a hostile environment for ticks. Cut down long grass, trim overgrown shrubs, and rake away leaf litter, so bloodsuckers have nowhere to hide.

You can spray the perimeter of your yard with insecticide, but this is often unsafe for animals. A good compromise is to leave ‘tick tubes’ in your yard, filled with cotton that has been treated with a tick-killing chemical.

Mice will steal the soft fabric to line their nests, inadvertently killing any ticks in the area. Mice are a major carrier of infected ticks, so this can really cut down on the number of parasites nearby.

3. Check pets regularly

Pets should be checked for ticks whenever they have been outside. If you check your pet as soon as they’ve come in, you may be able to find and brush away ticks before they’ve bitten.

They can bite anywhere, but prefer the areas where the fur is thin. This is usually the face and neck, the underbelly, and the insides of legs, so focus on these areas when checking for ticks.

Brush your fingers slowly all over your pet, feeling for any lumps, and paying especially close attention to long-haired animals. A feeding tick will look like a small pebble on your pet’s skin.

4. Spot-on treatments

You can buy tick treatments which are dripped onto a small patch of skin once a month, and release an active ingredient for several weeks.

Some types work by repelling ticks, some by killing ticks which take a bite. They are convenient, as they aren’t washed off by bathing or grooming, but can be toxic if ingested – avoid touching your pet until the treatment has totally dried.

Some of the most popular products include K9 Advantix II, Bio Spot-Spot On for Dogs, Bio Spot-Spot On for Cats, and Merial Frontline Plus Flea and Tick Control (although there are counterfeit issues with the latter product).

Pesticide products that kill ticks are called acaricides. They are commonly used in impregnated collars, sprays, dusts or topical treatments. Some acaricides kill the tick on contact. Others may be absorbed into the bloodstream of a dog and kill ticks that attach and feed. Source: CDC

5. Sprays, shampoos, and powders

These are different types of topical tick repellent, which all work in a similar way. Sprays and powders are rubbed into the fur, and will usually last for a few weeks as long as the animal doesn’t get wet; shampoos are used to soak the fur before being rinsed off, and usually last only a few days.

6. Oral tablets

There are only a handful of medications which have been proven to kill ticks – most brands labelled “flea and tick medication” have only been tested on fleas. Tick-killing tablets, administered monthly, are available only on prescription from your veterinarian.

7. Collars

You can buy collars such as the Virbac Preventic Tick Dog Collar that are imbued with permethrin, a scentless insect repellent which will discourage ticks from latching onto your pet.

These collars are great for cats, because they are small enough for the collar to protect their whole body.

On large dogs, some collars will only protect the head and neck while others such as the well-reviewed Bayer Ceresto Tick and Flea Collar offers whole body protection (keep in mind that it takes a few weeks to become fully activated).

8. Natural remedies: be cautious.

There are lots of natural remedies said to discourage ticks, from essential oils to common foods like garlic and lemon, but it’s usually a bad idea to apply them to your pet.

Dogs’ and cats’ noses are so sensitive that strong-smelling treatments can drive them crazy. Garlic and citrus are poisonous to most animals.

A natural treatment which works: coconut oil

Coconut oil contains lauric acid, which has been proven to repel ticks, and it makes your pet’s fur slippery so it’s hard for ticks to grip on.

Simply rub it into your pet’s fur daily. The disadvantage is that it leaves a greasy residue, so if your dog likes to roll around on the carpet they will leave stains.

tick-prevention-and-control-tips-for-pets
be diligent when it comes to pet tick control, your pooch will thank you for it.


Ticks on pets treatment tips

9. Careful removal

Whichever method you use, make sure that the tick is fully removed. It’s easy to break off the tick’s body but accidentally leave the grasping headparts embedded in the skin.

This is not only uncomfortable, but leaves your pet vulnerable to infection.

10. Picking them off with tweezers

Using needle-nose tweezers (flat tweezers would crush the tick), grip the tick as close to the skin as you can.

The aim is to pinch the head of the tick, not its body or your pet’s skin. Pull steadily outwards in a straight direction until the tick comes away from the skin.

It might take a couple of minutes of tugging before the tick lets go, as they have barbed mouthparts which grip flesh tightly.

11. Whipping them off with thread

Another possible technique is to tie a fine thread around the tick, as close to the head as possible, and pull upwards and outwards.

This method isn’t ideal (there’s a risk of crushing the tick’s body if the thread is in the wrong place) but it’s a useful back-up if you don’t have the correct tools handy.

12. Tick removers

Tick removers are designed to grip the tick’s head and twist it free: some look like a tiny bent fork, others like a loop of wire at the end of a stick. They are usually more comfortable for pets than tweezers, as the twisting motion won’t tug your pet’s fur.

13.Preserving the tick

Tick-borne illnesses are hard to diagnose: some pet owners preserve the tick after removal, to show to the veterinarian if their animal later becomes sick.

Simply drop the tick into a container with some rubbing alcohol, which will kill and preserve it, and mark the lid with today’s date.

14.Treating the bite

The bite should be cleaned and disinfected after you’ve removed the tick, to reduce the risk of infection.

15. How not to remove ticks from pets

There are plenty of old wives’ tales about removing ticks. Burning it off with a lit cigarette, suffocating it with a thick layer of Vaseline, spraying it with insect repellent, freezing it with an ice cube… all bad ideas.

When a tick becomes physically agitated – like if you squeeze its body – it responds by regurgitating the contents of its stomach.

That means infectious sludge will be squirted inside your pet, increasing the risk of tick-borne illnesses.

Avoid ticks as much as possible; check your pet regularly; remove ticks scrupulously. Three simple steps to keep your pet healthy and happy all summer.


References

Buying Mosquito Repellent Clothing: 10 Things To Consider

Mosquitoes are the world’s most hated insect. In many areas they carry deadly diseases; even in places where mosquitoes are technically harmless, the itching from their bites can drive you crazy. Nothing ruins a summer’s evening faster than a swarm of bloodsuckers.

An effective mosquito repellent is a must if you’re spending time outside in warm weather. There are dozens of different formulations available, from scary high-DEET insecticides to fragrant herbal concoctions.

The trouble with chemical repellents is that you have to keep re-applying every few hours, which can be a real inconvenience if you’re spending long periods of time outdoors.

And there’s always the chance of missing a spot, which means mosquitoes will make a feast of your single bare patch of skin.

Covering up can help to reduce bites – long sleeves, trousers, closed-toe shoes. But just covering up isn’t enough: thin or stretchy fabrics won’t protect you.

To prevent mosquito bites, dress wisely. You can either block the mosquitoes physically, or use a chemical barrier which repels them.

it takes more than a cork hat to protect yourself from mosquitoesit takes more than a cork hat to protect yourself from mosquitoes

1) Fabric

Knitted fabrics contain millions of tiny holes which can be easily pierced by a mosquito’s sharp proboscis. Most athletic clothes (like t-shirts and base layers) are made from knit fabrics, which means standard outdoors gear may not protect you from bites.

Tough woven textures provide better protection; the firmer the fabric the better. A tightly-woven nylon or polyester shirt will physically block the mosquitoes from getting to you.

The drawback is that this sort of fabric can feel quite stiff and uncomfortable, so look for fabrics which contain 5-10% spandex or elastane for stretch.

2) Style

The ultimate mosquito barrier is woven polyester. But this can be quite sweaty, so make sure your clothing has extra ventilation to improve breathability: look for underarm mesh, half-zips, and roll-up sleeves, as well as wicking technology which pulls sweat away from your skin.

3) What you should know about color

There’s a common myth that mosquitoes will be attracted to bright colors, but this is only half true. Male mosquitoes feed on flowers; it’s the female mosquitoes which suck blood, and they generally hunt by scent rather than sight.

Splashy clothing might make males think you are a colorful plant, but they will buzz around you harmlessly.

Bloodsucking females follow the smell of your sweat or the carbon dioxide on your breath; they wouldn’t notice your clothing if you wore a Carmen Miranda headdress.

Dull-colored clothing can help to stop insects swarming around you, but it won’t make you any less likely to be bitten.

4) Headnets and hats

In areas where the bugs are really dense, a headnet is a lifesaver. It not only prevents bites, but also stops bugs flying into your eyes and mouth.

Nets such as the best-selling Qibox headnet, are commonly held in place by a firm-brimmed hat at the top and a ring of metal at the bottom, to keep the netting away from your face.

An elasticated bottom stops creepy-crawlies getting under the net from below. Nets come in various thicknesses: mosquito netting is loosely woven, whereas midge (no-see-um) netting is finer to prevent smaller bugs from squeezing through.

Unless midges are a real problem in your area, mosquito netting is usually a better bet.

The plastic in the stiff hat brim can make you sweaty, and the looser weave of mosquito netting makes it cooler as well as easier to see through.


5) Inbuilt mosquito repellent

If you’re sick of just blocking mozzies and want to actively repel them, try mosquito-repellent clothing. It’s used by the US Army in tropical areas, as they don’t want their soldiers laid low by malaria or swatting bugs when they’re trying to creep unseen through the undergrowth.

The active ingredient in mosquito-repellent clothing is a powerful insecticide called permethrin. Odorless to humans, it repels not only mosquitoes but a variety of other biting insects, from midges to ticks.

Clothes are imbued with permethrin in the factory: the beneficial effects are said to last for up to 70 washes, which is the lifespan of an average garment.

“when permethrin is infused to fabric the bug repellent is more effective and longer-lasting when compared with spraying on the skin”

Mosquito-repellent clothes offer 99% protection against mosquitoes for the areas of skin they cover. Permethrin not only repels mosquitoes, but kills them dramatically if they do land.

Your clothes will protect the skin for a short distance around – so a short-sleeved shirt, for example, will also stop your neck and forearms from getting bitten.

You will still need repellent on exposed areas of skin, but you don’t have to worry getting nibbled underneath your collar or cuffs.

“permethrin is the only pesticide approved by the EPA for pre-treated fabrics”

6) How to care for mosquito repellent clothing

The great thing is that these clothes are easy to care for; you don’t need to take any steps to preserve the protection, just chuck them in the washing machine with a standard laundry detergent.

Dry-cleaning should be avoided as will remove the protective coating – but not many people dry-clean their mosquito nets anyway.

7) Do you want a physical or chemical barrier?

It really depends on your personal preferences, and how bad the bugs are in your area.
The big benefit of mosquito-repellent clothing is that you can use less insect repellent on your skin – you’ll need to apply it only to the exposed areas.

It’s a great choice if you have sensitive skin, because the chemicals stick to your clothes rather than your skin. The permethrin soak is applied to clothes after they have been finished, and it doesn’t affect the feeling of the fabric or reduce its moisture-wicking properties.

On the other hand, these clothes are expensive – about $10 more than standard travel gear, which isn’t cheap to start with – and the repellent effect decreases slowly with washing.

Permethrin is also extremely deadly to aquatic life. Though the amount in a single item of clothing is small, some consumers worry about the cumulative effect of permethrin soaking into rivers from hikers’ gear.

8) Should you wear treated clothing from head to toe?

The effect of permethrin is much more noticeable on thin fabrics, such as t-shirts. Clothes like jackets and hiking trousers are usually thick enough to discourage mosquitoes, whether or not they have been treated.

If you like the idea of mosquito-repellent gear but don’t want to replace your whole travel wardrobe, consider getting chemically-treated hats or wristbands. Sweat and friction mean that the face and hands are the hardest areas to protect, so a fug of insecticide from your clothes will help to prevent bites.

You can buy permethrin-treated socks, such as these BugsAway Purdom Hiker Socks which are an excellent choice even if you choose not to use the repellent on the rest of your clothes. They repel ticks and other nasty bugs too.

By their nature, socks have to be made of stretchy knitted material, and there’s no way you can wrap a physical barrier like woven polyester around your feet.

This means that you ankles are like an all-you-can-eat buffet for insects. Insecticide-treated socks will not only stop bites, they will also discourage ticks from making their way up your legs.


9) Are there other options?

Commercially-made mosquito repellent clothing tends to be designed for travellers and hikers. Everything is sturdy and practical, but there’s a fairly limited range of styles and colors.

If you don’t like what’s available, it’s possible to mosquito-proof any item of clothing by soaking it in diluted permethrin at home. The effect will last for 5-6 washes, and works for any type of fabric.

You can also buy the chemical in a spray bottle to spritz onto your clothes: this will only last for a couple of washes, but it’s a quick and easy treatment.

10) What else do you need to consider?

It sounds obvious, but many people forget that mosquito-blocking clothing also needs to be comfortable. Whether you choose chemical treatments or a physical barrier, make sure that the clothes are breathable and easy to wash.

Present-day mosquito repellent clothing  has come a long way in terms of sporting breathable, odor-free fabric that feels soft to the skin and does not get sticky from sweating .

Look for features like fast-drying, moisture-wicking fabrics, mesh and zips for ventilation, and SPF protection for sunny days.

The Dalai Lama famously said,

“Anyone who thinks they are too small to make a difference, has never slept in a room with a mosquito.”

The little pests get everywhere. This summer, you can rest easy, knowing that your clothes will protect you from bugs and bites.


Recommended products

Popular mosquito-proof clothing choices on Amazon are Coghlan’s Bug Jacket and Coghlan’s Bug Pants.


2 Tips for extra safety

If you’re not fully protected by wearing quality mosquito protection clothes, make sure to;

  •  use DEET (it’s safe when used appropriately) and


the benefits of sleeping under a mosquito net


Images, Wikipedia and Wikimedia Commons.